Happy Saturday

I awoke with a good feeling today, that sort of "I'm ready to take on the world" type feeling. Wouldn't it be great if we could bottle that feeling and take a swig as needed? I'd be swigging it often, trust me!


Strolling around the garden I find it is very dry as we've had a lot of light showers but no soaking rain. Still, there are always good things to be found. Like the new, fresh blooms on the Datura.


Like the totally laden persimmon tree (and persimmon just happens to rank very highly in my list of favourite fruits!)


Like the red climbing rose that my husband grew from a cutting and that now insists on flowering 3 times a year! I'm not complaining :)


And in the kitchen I'm whipping up a batch of husband's favourite pate fermente bread.

I hope your Saturday (or Friday as it may be for you) is feeling as good as mine.

God bless.

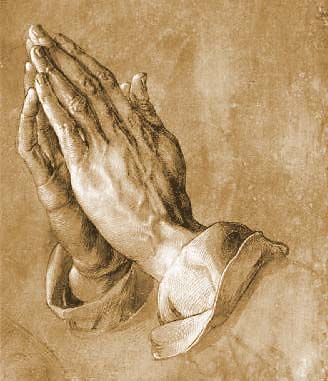
Christ the Priest


I promised Vicky a look at our beautiful Christ the Priest statue. 


It was gifted to us by my brother in law, who is a priest with the Confraternity of Christ the Priest.


It took some getting used to this statue - perhaps because I'm used to seeing statues of Our Lord clothed in white or red but never green. I absolutely love it now and it takes pride of place on the desk (another special gift from a family member when she left to become a Missionary of Charity) that we kneel before to pray the Rosary.


These statues are available to purchase, and amazingly they are only $40!

God bless you all :)

3 ways to save money today!


1. Credit Cards.

I'll keep saying it. Credit cards make people poor and stressed. Cut up your card now. Save for purchases instead of using credit. It's a big trap!

2. Shopping.

Don't go shopping without a plan. This goes for groceries, clothes, appliances - whatever you are going shopping for. Have a plan, write it down if necessary. Decide before you go how much you're prepared to spend and stick to it. Don't impulse buy!

File:Bundesarchiv Bild 183-28437-0002, Präsentation von Einkaufstaschen.jpg

3. Wait and reconsider.

You want to buy something. You really waaaaaant it! But do you need it? We are used to getting what we want, when we want it, right? If you decide you must have something, and particularly if it's expensive and not a necessity, I dare you to wait (a week, a month?) See how you go without it. After the waiting period, do you still really waaaaant it? It can be worth the wait, especially if you decide you don't actually need the item and can save the money instead.


My next reno project...


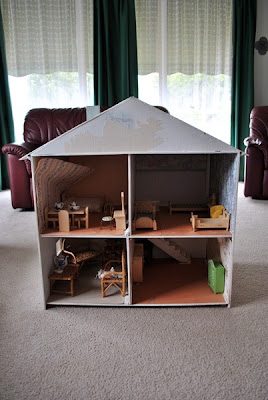
Involves a free doll house with some furniture and accessories that apparently sat in someone's spare room for many years.


It's a little worse for wear but mostly cosmetic and the classic style reminds me of a beautiful vintage doll house I had as a child (it apparently belonged originally to one of my Aunties - my Dad found it in an old shed on the farm and cleaned it up for me).


Searching online has lead me to having to restrain myself from buying all sorts of ridiculously expensive but absolutely gorgeous miniatures!


Nope, this is definitely going to be a budget project. Wish me luck! 

Oh, and if you have any ideas or recommendations I'd love to hear them :)

Daisy's Garden

I was so thrilled to be the winner of Carol's "treasure chest" giveaway recently.


And even more thrilled when my parcel arrived today!


So many beautiful laces, buttons, silk threads, silk ribbons - oh my!


Thank you so much Carol, all of these pretties will be put to very good use!

Daisy's Garden is a fantastic little shop for embroiderer's, do take the time to have a look.

Carol also has a blog with lots of tutorials and resources (and giveaways!)

Waldorf softie doll tutorial part 2.

I'm a little embarassed at how long it has taken me to complete part 2, but I'm terrible at finishing what I start! Part 1 of the tutorial can be found here.


The pattern can be downloaded and printed from here.

For the body you will need  2  9x 9 inch pieces of knit fabric. Use a good quality knit with a percentage of elastane for a good result. If the knit is too stretchy, your doll will stretch out of shape.
You will also need clean carded wool for stuffing.
For the pixie hat you will need approx. 11 x 11 inch piece of knit to be folded.


Place your knit pieces together, right sides facing. Pin the body pattern on with the most stretch running horizontally and trace around it onto the fabric.


Place a few pins to stop the fabric moving. With a ballpoint needle and matching thread, stitch on the lines you traced, leaving a gap where indicated. Use small stitches to make strong seams. If you're concerned about seams parting during stuffing, stitch right around the body piece again, leaving the gap open.


Cut around close to the seam lines being careful not to snip the stitches! Snip the curves. Be very careful when cutting between the legs, go slowly.


Turn the body piece right side out, running your finger around the inside seams to turn all the pieces properly. Ain't that cute!


Stuff the body with clean carded wool. It is up to you how firmly you stuff, but keep in mind that the wool stuffing will relax over time. When stuffing, try to leave a hollow space where you will insert the neck.


Pop the head into the opening and stick pins into the "muff" that you created when making the head. Make sure the raw edges of knit are folded in around the neck - the great thing about knit fabric in this case is it tends to naturally roll inward, so it makes it easy to get those raw edges in.


Now, beginning at the back of the neck, hand stitch all the way around the neck, catching the head and body together. I use a little "catch stitch" which is almost invisible. I use a doubled thread in a complimentary colour. Stitch the little shoulder seams as you go. I stitch around the neck twice to ensure it's really secure.


You can do a full head of hair if you wish but here I will show you how to do a pixie hat with a little hair tuft peeking out. Using a lovely, natural yarn make 3 - 4 loops. Pin these to the top of the head so that the cut end is poking towards the back of the head and all the nice loops are at the front, over the forehead. Stitch across the loops in a place that won't show once the hat is on to secure them to the head.


Now the hat! Fold your second piece of knit with right sides together. Place the pixie hat pattern (triangle) onto your fabric against the fold where indicated and with the most stretch running horizontally. Stitch along the long, straight side, up to the point, leaving the bottom edge open.

Turn right side out and poke out the point of the hat with a knitting needle or similar. Placing the hat seam at the back of the doll's head, pin in place.  See how the knit has rolled up at the front to make a rim?


You may have to tuck up the hat at the back, which is easy to do. Using a catch stitch and matching thread, sew all the way around the hat, catching it to the head. 

How does your doll look? I'd love to see it!
I'd also love your input (i.e. let me know if there are any mistakes in the tute!)


 Just a little heads up. I'm approaching 800 blog posts and am in the mood to celebrate with a little giveaway. I'm thinking this mushroom doll may be featuring. Ssshhh!

Stitch markers


 I was in need of some stitch markers so thought I'd make some up for my Madeit shop as well.


They're $4.50 for a set of 4.


They can easily be put in with a yarn purchase without having to pay for postage.


Speaking of postage, Australia Post has been very popular this week for all the wrong reasons, mainly that they are way too greedy and are making things really difficult for business owners who rely on the post to get their products out there.

"Change" is running a petition which you can sign here.


A brand new day.


It's amazing what a good sleep, a good talk with my husband and some heartfelt prayer can do.

Today is a new day and it's a better one.

I've set aside some time for knitting and reading. My dear and wonderful husband took over our little "school house" this morning so I could go out and catch up on errands. 

A few small changes can be so refreshing.

Thank you for your really lovely comments on yesterday's post - I do so appreciate the experience and gentle words of others who understand a little of me even though they don't know me.


Down but not out.


I've had a number of disappointments of late - major and much wanted changes that just haven't worked out. Things have started to get on top of me a bit. I've started to feel really, really tired. Nothing feels inspiring. I don't feel hopeful. I can't be bothered. I wallow in this for a while. I pray that things will get better.

And slowly, they do. Because I don't live this life alone and am not even able to draw breath of my own accord. Because I have a tender, loving and wonderful Father who takes care of me. Who knows me intimately and sends me consolation when I feel so awful.

As things start to improve the feeling of hope returns. Because, as long as we have faith we are never without hope. It really does spring eternal, because God is eternal and even when we give up on ourselves He will never, ever give up on us.


New hand dyed yarns


Hand dyed "Dusky Heath" 100g skein 8 ply superwash luxury merino.
$18 plus postage


Another view of the hand dyed "Dusky Heath" 


Another view of the dip dyed by hand "PPB" (pinks, purples, blues)


Dip dyed by hand "PPB" (pinks, purples, blues) -100g skein 8 ply superwash luxury merino.
$18 plus postage

Please leave me a message if you're interested :)

Thanks for looking!

It's all about yarn :)

Yes, even my beloved embroidery has fallen to the wayside for a little while as my love of yarn and knitting continues. Dyeing my own yarn is also really rewarding, as whatever craft I'm doing I always like to have as much involvement in the process from start to finish as possible. OK, so I don't have my own sheep and spinning wheel yet, but who knows what could happen? :)


I've just finished this cute Olearia (pattern by Tikki). I intended to have long sleeves but became scared that I was running out of yarn, so short sleeves it is.


I dyed this 8ply merino with really strong colours in fuschia and raspberry, using a variation of the hand painting technique to get the variegated colours. The glass buttons which are impossible to photograph accurately were gifted to me some time ago are beautiful and I've kept them for a special project.


I've already cast on my next cardigan using more of my hand painted yarn (I love the way this turned out!) I'm hoping to start selling more of my hand dyed yarn to fund further exploration, there are just so many beautiful fibres and I need to get my hands on them!
If you're interested in any of my hand dyed yarn please do contact me :)

This blog is closing!

All posts will now be found at my new site.  Click here to go the the new site.